Every jeweler, beginner or experienced, has a question in his head: how to melt gold at home. This is not as simple as it seems, because there are many pitfalls and nuances that should be taken into account by an individual who wants to engage in the business in question. For example, the metal should not be brittle and porous, as it turns out due to the action of oxygen on gold.
Let's figure out how to melt gold correctly. The question of how much remelting costs will also be raised.
What is needed for smelting
To melt this noble metal, you need the following:
- Crucible. Pure gold melts at temperatures exceeding 1000 degrees Celsius. Not everyone has a working container - a crucible - that can cope with such heat. But it can be replaced with raw potatoes. It is necessary to cut a hole in the tuber and put gold there. A container of natural origin will cope perfectly with melting.
- Forceps. Heat-resistant tongs are an essential tool when melting gold. They will have to touch the crucible frequently.
- A mixture of sodium carbonate and borax. It is used to make flux, which is added to gold before the smelting process. It takes two pinches of flux to clean every ounce of gold. The dirtier the noble metal, the greater the amount of this substance required for cleaning. Flux can also be made from baking soda and bicarbonate. When adding a substance, the contact between gold particles improves, and all impurities are better removed from the metal when it is heated.
- Oven or microwave. There is an option to purchase an electric furnace to melt metals or use a microwave. The latter must have a power of more than 1000 W, with a magnetron located on the side or behind the equipment.
There are furnaces sold at inexpensive prices that are specially made for melting metals. Such a device is designed for mixing several minerals at once, for example, gold, silver, aluminum, copper.
Attention! The microwave in which the precious metal was melted can no longer be used for domestic purposes. That is, heating and defrosting food.
If there is no oven or microwave, you must use a gas burner.
Model casting in earth molds
Casting in so-called earth molds is the oldest method, proven over thousands of years. Molding mixtures do not actually consist of black soil, but are a mixture of fine-grained quartz sand and plastic clay in certain proportions. For casting small products with thin relief and a large number of parts, mixtures containing 12-15% clay are used, for large castings - up to 25%. Gases generated during casting must escape freely through the walls of the mold.
Casting silver according to models in earthen molds
The model for casting into earthen molds is made absolutely exactly repeating the original, but a little larger in size. This is an allowance for shrinkage and subsequent processing of the product. Models were traditionally made from wood, wax and plaster. Today, plastic models are becoming increasingly popular. The plastic holds its shape well and is easy to process.
Scrap melting (process)
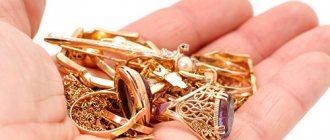
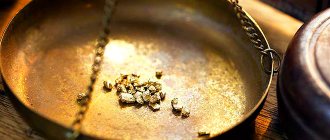
You need to be prepared for the fact that there will be a lot of impurities in scrap gold. Sometimes their amount in the metal reaches 25%. Such scrap is not suitable for figure casting, but you can work with it using the printing method (that is, heat and stretch).
- First, you need to sort the scrap by color. The more copper it contains, the redder its hue.
- To speed up the melting process, it is recommended to divide the scrap into small pieces.
- Next, you need to carefully sprinkle flux inside the crucible and put the precious metal there. You need to start with larger items (if you need to melt a lot of things), and add smaller ones as the process progresses.
- So, when the gold objects are laid out in the crucible, the latter is placed inside the furnace and wait until the gold becomes completely molten.
- Then you should pour the resulting substance into molds. And after that, immediately harden the metal with water or alcohol so that products made of metal become stronger.
But what to do if you only have a gas burner made by yourself?
Melting using a homemade furnace
If it is not possible to buy a muffle furnace for melting gold, you can make a furnace for melting metals. The first thing you need to do is identify the requirements for such a stove. It should be compact and easy to use and at the same time have a wide heating range. With enough skills, you can assemble such a stove at home yourself.
It will look like this: carbon graphite powder is poured between two electrodes, which are made of graphite and to which a voltage of 25-50 V is transmitted. For the stove you will need a very powerful transformer (suitable for a welding machine). Graphite powder produces gradual and intense heat due to its characteristics, making gold melting as efficient as possible. The main advantage of such a furnace is the fact that it can heat the required sample to very high temperatures, including those necessary to melt gold.
The furnace heats up in 3-5 minutes, which allows you to quite accurately control the metal soldering process. The oven itself is made from available materials: ceramic or cement tiles, mica and graphite. The dimensions of the furnace, that is, the distance between the electrodes, directly depends on the output voltage of the transformer. The volume of the furnace will be enough to melt several grams of metal.
Brushes from a powerful motor are used as electrodes; holes should be made in the sides for stranded copper wire. It is necessary to make a notch on the inside of the electrode to improve contact with the powder. Reinforce the outer walls with tiles, and use bricks as a stand. Used rods are suitable for carbon graphite powder.
Melting gold occurs like this: in the middle of the furnace, a hole is made in the powder, where the metal is placed and buried. To make sure that it has melted, you need to shake the furnace - if the surface of the powder fluctuates, the molten metal is turned over and heated further. Melt until the molten liquid becomes homogeneous and acquires a spherical shape.
Making a homemade burner
First, let's look at how to create a gas burner. To do this you will need the following materials:
- injector;
- sprinkler from sprayer;
- automobile pump;
- sealant;
- tin can with lid.
It is necessary to visually divide the jar with the lid horizontally in half, and make two holes for the hoses in the upper part of it. Insert the pump hose into one of them, and the hose leading to the sprinkler into the other. Next, connect the latter and seal the holes.
To check whether the container is sealed or not, you should pour a little gasoline into the jar and start pumping air. Ideally, it should fly out of the sprinkler hole. If this happens, you can start melting at home.
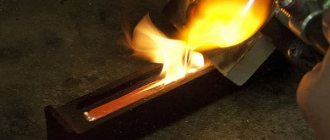
Melting metal using a torch
Using a gas torch, you can melt metal in a matter of minutes.
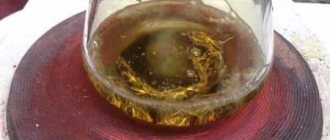
First you need to sprinkle the crucible with borax (flux), then put the scrap in there, which has already been crushed. The more borax, the lower the temperature required to melt.
Next, pour in alcohol, set it on fire and wait until it burns out completely. It must be remembered that the crucible must be placed on a refractory area.
Turn on the burner and adjust it so that the edges of the flame are yellow and the middle is blue. The process is carried out using an open fire, so the crucible cannot be heated quickly. A crack may appear on it. The procedure is carried out slowly and evenly. The flame is kept at a distance of several centimeters from the metal.
The redder the metal, the lower the burner should be lowered to it. This is necessary so that all the ligature from the metal disappears, and parts of the material are melted down faster.
At the end of the procedure, the precious metal is poured into molds and hardened with water.
Useful tips
In order not to encounter difficulties, you should adhere to some rules and recommendations during the process of melting down gold products. Experienced jewelers advise the following:
- For melting, it is better to purchase a special crucible. Most often it is made from clay or graphite.
- To avoid possible burns, it is advisable to wear gloves, a mask and use metal tongs in advance.
- If it is not possible to purchase a crucible, then you can use fresh and raw potatoes. But first you need to make a hole in it.
- Before melting, it is necessary to clean the surface of objects; this can be done using a special flux, which is sold publicly in specialized stores. They can be of different shapes, so it is possible to choose the most convenient device. Flux helps improve contact between gold items, allowing them to fuse better.
- When carrying out the procedure, safety precautions must be observed, since the work takes place at a very high temperature.
- The room in which it is planned to remelt must be absolutely safe; a garage, outbuildings or open verandas are best suited for this. But there should be no flammable substances or objects near the workplace.
- As a form, you can use any container made of the same material as the crucible. It can be square, cylindrical or rectangular; this factor does not play a special role.
As you can see, there are simple ways in which you can independently melt gold, silver and other precious metals at home. To do this, you can mount a stove with your own hands or assemble a gasoline burner. The main thing is to comply with all requirements and follow some tips.
Melting down pure gold
Unlike scrap, pure gold can be melted down in a barbecue with thick walls.
We light coals in it and place a crucible there with metal pre-cut into small pieces. You need to monitor the fire every minute and periodically blow it. When the metal is completely melted, it is poured into molds.
Tips for Beginners on Melting Pure Gold
- You cannot melt precious metal on a kitchen stove, as there is a high risk of starting a fire. Gold smelting is carried out either in a room specially designed for this procedure, or in a courtyard at a summer cottage (for example). Definitely need a table.
- Beginners are advised to consult an expert before the procedure.
- The individual must follow safety precautions, so he must wear a mask and goggles to protect his face. You should wear heat-resistant gloves and an apron when working.
- There should be nothing flammable near the melting point. This also applies to interior decoration elements.
- Beginning “masters” without experience should not immediately take on gold of the highest standard, as there is a high risk of spoiling it. You should start with 999 fine bullion, which can be purchased at any state bank. As for the crucible, you can buy it in online stores.
- To prevent pure gold from becoming brittle and porous, which will definitely happen to it because oxygen gets into the metal, it is necessary to shake it before pouring the liquid metal into the mold and only then quench it with water or alcohol.
- You cannot melt precious metal using a gas welding machine. After all, they only melt steel - the gold will simply evaporate.
- If the procedure takes place in artisanal conditions, not in a crucible, but in a potato tuber, then a hole is made in it and borax is poured into it. And only then do they begin to melt the metal.
- 24 carat gold is very malleable. Therefore, to make it stronger, it is necessary to alloy it with another metal.
How to melt gold with a ligature?
Usually the metal used in jewelry is not pure. Additives to gold are:
- copper;
- rhodium;
- silver;
- nickel;
- chromium;
- palladium.
If the gold alloy is yellow or red-yellow in color, then copper and silver have been added to it. In this case, the more copper there is, the redder the color. If the product does not contain copper, but there is quite a lot of silver, then the tint of the alloy will be green. The remaining metals are contained in white gold.
Remember: if the gold is very red in color (meaning it contains a lot of copper), then it is not intended for figure casting. Such an alloy can be heated and drawn.
If you want to melt metal with mixtures, then melting gold would look like this:
- To begin, sort the raw materials by shade.
- It is necessary to grind the scrap, as small grains melt faster.
- The raw material is poured into the crucible.
- Then you need to pull the gold out of the furnace and pour it into the mold. After this, the melted gold will no longer contain the alloy, since it will burn out first.
Remelting cost
Not many people think about starting a business by melting gold. But this is quite a profitable business.
There are many situations when, for example, a capricious lady does not like the shape of jewelry, or the size is not suitable. That's why many people order their jewelry melted down.
How much does it cost to melt gold? Experienced craftsmen name the cost depending on the weight of the jewelry. Therefore, it is not advisable to melt down jewelry that weighs no more than three grams. It's easier to fix - it will be cheaper. Items weighing more than 10 grams are usually sent for melting.
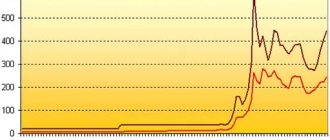
The cost of melting gold of the lowest standard is 500-600 rubles per gram.
The worst gold is found in cheap Chinese or Turkish jewelry. Few people would agree to do such hard work. The best sample is considered to be 585. The more qualified the master, the more he charges for his services. On average, the price ranges from 1200 to 1700 rubles per gram.
Interestingly, during the remelting process, the product evaporates by 10%. This happens due to metal splashing during melting and volatilization during remelting.
Remelting gold, the price of which is minimal, will take longer: the worse the quality of the metal, the more impurities it contains, which will take several hours to remove.
Table 1 - cost of gold smelting depending on the sample (Moscow prices)
| Try | Cost of regular execution (RUB/g) | Cost of urgent execution (RUB/g) |
| 375 | 500 | 650-700 |
| 500 | 700 | 910 |
| 583 | 1200 | 1560 |
| 585 | 1400-1500 | 1820-1950 |
How to smelt gold ore?
Gold ore can be mined with an iron or diamond pickaxe and smelted in a furnace to produce gold bars. Gold ore is also called: Gold, Gold ore. Gold ore is present in Minecraft versions: 1.8.2, 1.8.1, 1.8, 1.7.10, 1.7.9, 1.7.5, 1.6.4, 1.5.2.
Interesting materials:
How to delete a comment in Yandex Taxi? How to remove seeds from sloe berries? How to remove Microsoft Edge Remontka? How to delete recently closed tabs on iPhone? How to remove unnecessary channels on Samsung TV? How to remove an ad from your account? How to remove a Yandex browser update? How do I remove a family organizer? How to remove fruit stains? How to remove stains from polished furniture?
Jewelry Making Lessons for Beginners: Free Self-Learning Videos
People have loved jewelry since ancient times.
Primitive people wore bracelets, rings and necklaces, earrings for self-expression, in order to emphasize status and wealth. Since then, almost nothing has changed. Only material processing technologies and design have become more diverse and professional. Becoming a jewelry maker is a feasible task for anyone who loves handicrafts. You can learn how to model jewelry and master casting and inlay techniques using free video lessons for beginning jewelers. You can study from scratch and at home.
Jewelry modeling
The work of a jeweler is varied and includes many skills. In recent years, with the advent of computer 3D modeling, there has been an added need to master the appropriate computer programs and design skills. Modeling is the path from sketch to model.
Burner overview
Jewelry burners - gasoline and gas. The first type is better for home use. The gas model assumes obligations to regularly change the cylinder. When choosing and purchasing, you should pay attention to the dimensions and weight. It is better to choose miniature and lightweight samples that can produce a powerful flame.
Tools and equipment
The jeweler's arsenal is quite wide. You can really do a lot of things with your own hands.
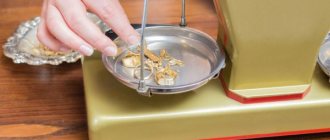
- Electronic balance.
- Container for melting and drying (crucible).
- House for holding heat.
- Boroshnitsa for diluting fluxes, bleaches, etc.
- Titanium stick for stirring alloys, solder set.
- Fireproof surface for annealing and soldering.
- Burner (gas, petrol, manual).
- Rollers for wire and plate blanks.
- Dies for creating tubes and wire.
- Crossbar - a rod for giving shape.
- Pliers and round nose pliers (flanges).
- Scribbler and core for markings.
- Collet grip handle.
- Jigsaw for cutting.
- Drilling bur.
- Presser and rooter (used when setting stones).
- Ironing and scraper (polishes).
- Stichel - hand cutting.
- Shperak is an anvil.
- Anka for creating bulges.
- Flaheisen is a small forging plate.
- Knurling for small ornaments.
- Needle file (file).
silver ring
It is recommended to gain your first experience in jewelry making by creating rings. Possible options are cocktail, trinity, engagement and wedding rings, rings, signets. For advanced craftsmen - open, with chains or pendants, for two or three fingers. The choice of materials includes white, rose, yellow and red gold, platinum, silver, titanium, tungsten, palladium, tin, copper.
Stone setting
Inlaying objects with stones is an ancient technique with an interesting history. You can inlay any product: pendants, earrings, bracelets, necklaces, watches.
Common ways to fix a stone:
- pronged - fixation with hook paws,
- rim (blind, nested) - the oldest type, when the stone is hidden under the rim,
- adhesive (for pearls and other round parts) - glued to a pin,
- channel (rail) - a row of decor is inserted into a channel-shaped groove,
- corner - immersion in metal,
- pavé - placement in drilled niches in bulk,
- carmesine - a combination of prongs.
Casting
There are several technologies for making jewelry: stamping, rolling, drawing, casting. The latter is most often used when working with gold. Casting of designer products consists of the following steps.
- Creating a sketch (monolith or assembly of several parts).
- Casting in wax or using ready-made wax.
- Forming a flask to obtain a casting mold.
- Metal casting.
- Assembly, fastening of inserts, processing and grinding.
Tubular earrings
Congo is a common name among jewelers for classic hoop earrings. Why classic? Today, the model is the most universal: suitable for any style (from hippie to r&b), age (from teenager to older lady), gender and occasion (office, city walk, business meeting, romantic date). A simple version involves molding from a hollow tubular blank. If desired, you can decorate with pebbles or additional elements, experiment with thickness, shape, diameter and textures.
Golden balls
Balls are used as parts for all types of products. Or as blanks for stud earrings. Can be cast from silver or gold. The technology is the same; the result should be hollow spherical elements. The manufactured plate will need to be cut through with a notch or a circle cut out, then formed into a hemisphere using an anchor and punches.
Earrings for earrings
Earrings are the part of the earring that is inserted into the ear. Usually they have the shape of a hook with or without a clasp (loop, English, French locks). Even if the product is made of wood, plastic, beads or wire, the hook is always made of metal. It is better to use silver, gold, medical steel, titanium, which do not cause irritation and inflammation at the puncture sites.
Arabian Bismarck weave
Bismarck is beautiful, complex and one of the strongest weaves that guarantees longevity. It is no coincidence that the name is immediately associated with the iron nature of the famous German Chancellor Otto von Bismarck. Although the name of the jeweler who created the weave remains unknown. There are several varieties: abinata, Moscow, glamorous, single. Bismarck chains and bracelets look solid and are ideal for formal business suits and casual sets. They look less harmonious with elegant evening dresses, but are also acceptable.
Today, jewelry craftsmanship has turned from a craft into an art. The lesson gives scope for artistic and creative self-expression and design ideas. Also develops the concept of fashion, history, culture and modern trends
Master class on jewelry art: casting with stones
Lost wax casting is used by many jewelers, sculptors, and many other craftsmen.
Fixing inserts, that is, synthetic or natural stones in a cast and processed product, takes quite a lot of time and is a painstaking and delicate work. Failures and mistakes at this stage, as a rule, completely spoil the almost finished work. Moreover, work in which a lot of time and materials have already been invested in casting.
One way to make setting stones easier is to set them in a wax model before casting. Of course, not all stones can be set in wax. Rocks of sedimentary origin (malachite, chalcedony, opals) are guaranteed to be destroyed during calcination. Cracked ones (beryl for example) also will not withstand calcination and fire strikes from molten metal. I’ll say the opposite - under conditions typical for those reading this material, only synthetic inserts should be fixed in wax - cubic zirconia, cubic zirconium, corundum (ruby, sapphire). They are inexpensive, and their manufacturing technology requires a temperature one and a half times higher than that of molten silver.
On jewelry forums, many topics are devoted to wax setting, and no less reports are read at thematic conferences.
The following is the author’s modest experience, based on studying a huge amount of literature on the topic and his own modest experience.
First I make a wax model. This is a simple Art Nouveau ring in the form of two branches.
Then, under each stone, you need to drill a through hole in the wax. It is necessary so that the molding mass can get to the back of the stone and it remains in place after the wax melts and burns out. Drilling wax does not require any force, so it is convenient to twist the drill simply with your fingers. For 3 mm stones I use a 2 mm drill.
Now a stone is simply placed on this hole with tweezers, after which it is pressed with it, and with a heat spatula I place three prong balls around the stone so that it does not fall. I install it simply by eye, and not under the optics, so to speak, a rough installation. For an oval or oblong stone, the hole is lengthened with a cutter. In my experience, instead of changing the cutter blades in the handle, it is much easier to take several furniture dowels (these are sold in the hardware department at hardware stores) and provide each blade with a dowel handle. That's it - I cut it with a jigsaw and a drop of glue.
In the frame above, this is exactly the moment of the initial fastening of the stone into a rough (without optics) made model.
When all the stones are in place, you can remove the wax allowances around the stones, first with a heat spatula just by eye:
And then with cutters, under the optics. At this stage it is very important to give the model as final a shape as possible, since wax is easier and easier to process than metal. A variety of cutters, a thermal spatula, a scalpel and sometimes even sandpaper are used.
For me this is the longest stage of work. You need to make sure that each stone is open at the back and will not fall off during baking, that the wax bridges are even, and the prongs are the same. They also need to be corrected and leveled, since they are placed “by eye” and do not have the correct shape and the distances between them are not the same.
The picture below shows a model almost ready for installation on the Christmas tree.
When the model is installed in the flask, it must be molded.
Here, too, there is a small subtlety of casting with stones - the mold mixture is mixed with distilled water from a car dealership, and not tap water. First, I stir for two minutes with a stick, then quickly vacuum - when the pressure gauge needle reaches zero - I let in air. Then I liquefy the molding mass by tapping, pour it into the mold, tapping, vacuum, releasing the vacuum, and again - tapping the mold on the table until the molding mass becomes mobile - and again vacuum. After at least two hours, melt the wax and heat it to 200 degrees.
Then calcination of the flask, in my case just a PM-8 muffle furnace, regulator at 6, calcination for three hours. Vacuum casting, and I cover the flask placed on the table with mineral wool so that it cools more slowly. After pouring the metal, I carefully move the flask onto the concrete floor for quite a long time, at least twenty minutes. Then, by hitting the flask from the side, the molding mass crumbles, and the casting, covered in molding mass, appears outward.
Important - no throwing the flask into the water!
The mold mixture, sealed in distilled water, is picked out with an ordinary toothpick and cleaned of metal. Then sawing off the sprues, the usual finishing with a file and polishing. Everything is as usual here, except try not to touch the inserts with the file so as not to spoil it.
Luxury polishing paste can be washed simply with tap water and is not at all toxic (palm oil and aluminum oxide), unlike the powerfully coloring and difficult to wash off GOI paste.